In this tutorial you will learn how to create an Analogue Clock User Control which displays the Time and Alarm setting, which can be used to create a simple Alarm Clock!
Printer Friendly Download Tutorial 571KB) Download Source Code (16.8KB)
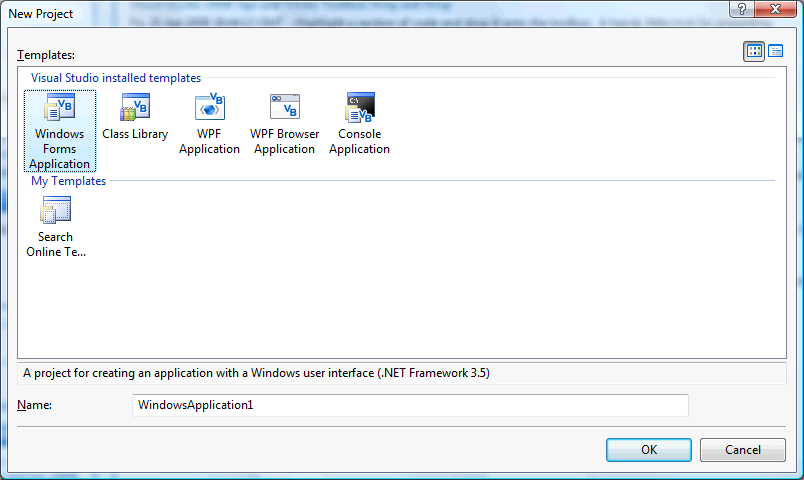
Step 1
Start Microsoft Visual Basic 2008 Express Edition, then select File then New Project... Choose Windows Forms Application from the New Project Window, enter a name for the Project and then click OK, see below:
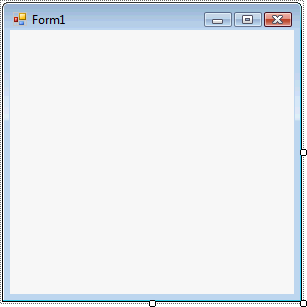
Step 2
A Blank Form named Form1 should then appear, see below:
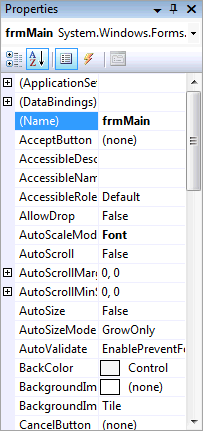
Step 3
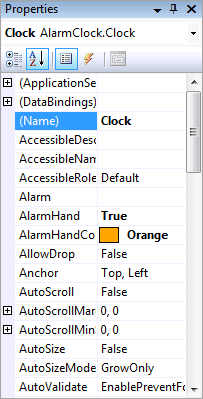
With Form1 selected goto the Properties box and change the Name from Form1 to frmMain
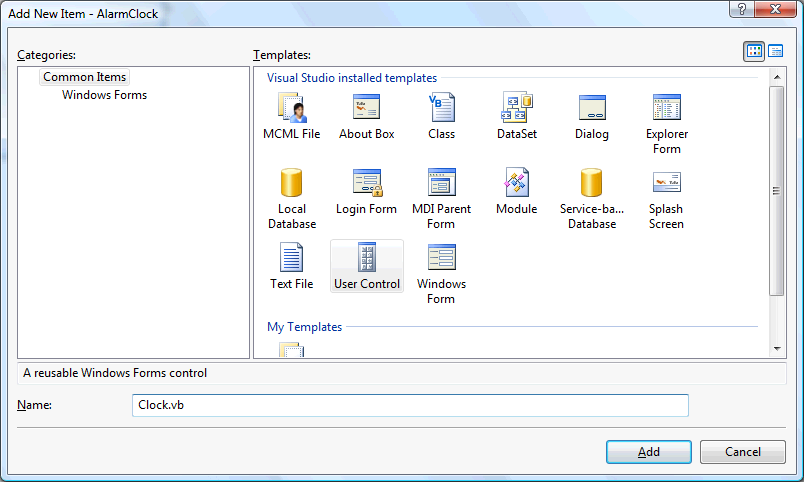
Step 4
Then select Project then Add User Control... and choose the "User Control" Template if it is not already selected and give it the Name "Clock.vb" without the quotes, see below:
Step 5
With the blank Clock User Control displayed, if not double click on the "Clock.vb" item in Solution Explorer, then right click on the User Control or the entry for it in Solution Explorer, then select View Code, enter the following above the Public Class Clock line:
Imports System.Drawing.Drawing2D
Imports System.Drawing.Text
Then enter the following below the Public Class Clock:
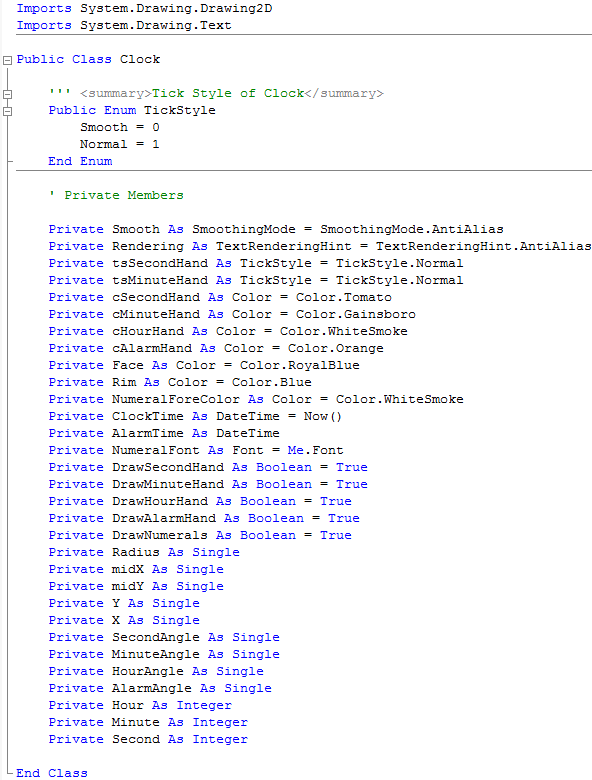
''' <summary>Tick Style of Clock</summary>
Public Enum TickStyle
    Smooth = 0
    Normal = 1
End Enum

' Private Members

Private Smooth As SmoothingMode = SmoothingMode.AntiAlias
Private Rendering As TextRenderingHint = TextRenderingHint.AntiAlias
Private tsSecondHand As TickStyle = TickStyle.Normal
Private tsMinuteHand As TickStyle = TickStyle.Normal
Private cSecondHand As Color = Color.Tomato
Private cMinuteHand As Color = Color.Gainsboro
Private cHourHand As Color = Color.WhiteSmoke
Private cAlarmHand As Color = Color.Orange
Private Face As Color = Color.RoyalBlue
Private Rim As Color = Color.Blue
Private NumeralForeColor As Color = Color.WhiteSmoke
Private ClockTime As DateTime = Now()
Private AlarmTime As DateTime
Private NumeralFont As Font = Me.Font
Private DrawSecondHand As Boolean = True
Private DrawMinuteHand As Boolean = True
Private DrawHourHand As Boolean = True
Private DrawAlarmHand As Boolean = True
Private DrawNumerals As Boolean = True
Private Radius As Single
Private midX As Single
Private midY As Single
Private Y As Single
Private X As Single
Private SecondAngle As Single
Private MinuteAngle As Single
Private HourAngle As Single
Private AlarmAngle As Single
Private Hour As Integer
Private Minute As Integer
Private Second As Integer
See Below:
Step 6
With the Clock User Control Code View still displayed, enter the following Private Methods below the "Private Members" section and above "End Class":
' Private Methods

''' <summary>GetX</summary>
''' <param name="Deg">Degrees</param>
Private Function GetX(ByVal Deg As Single)
  Return CType(Radius * Math.Cos((Math.PI / 180) * Deg), Single)
End Function

''' <summary>GetY</summary>
''' <param name="Deg">Degrees</param>
Private Function GetY(ByVal Deg As Single)
  Return CType(Radius * Math.Sin((Math.PI / 180) * Deg), Single)
End Function

''' <summary>Draw Clock on GDI Surface</summary>
''' <param name="g">Graphics Surface</param>
Private Sub DrawClock(ByVal g As Graphics)
  Dim Surface As Graphics = g
  Surface.SmoothingMode = Smooth
  Surface.TextRenderingHint = Rendering
  Surface.InterpolationMode = System.Drawing.Drawing2D.InterpolationMode.HighQualityBicubic
  midX = ClientSize.Width / 2
  midY = ClientSize.Height / 2
  X = ClientSize.Width
  Y = ClientSize.Height
  Dim TextBrush As New SolidBrush(NumeralForeColor)
  Dim Pen As New Pen(NumeralForeColor)
  ' Define Rectangles
  Dim Rect As New Rectangle(0 + 10, 0 + 10, CInt(X - 20), CInt(Y - 20))
  Dim RectRim As New Rectangle(0 + 20, 0 + 20, CInt(X - 40), CInt(Y - 40))
  Dim RectInner As New Rectangle(0 + 40, 0 + 40, CInt(X - 80), CInt(Y - 80))
  Radius = RectInner.Width / 2
  NumeralFont = Me.Font
  ' Face
  Dim FaceBrush As New SolidBrush(Face)
  Surface.FillEllipse(FaceBrush, Rect)
  ' Rim
  Dim RimBrush = New SolidBrush(Rim)
  Surface.FillEllipse(RimBrush, RectRim)
  Surface.TranslateTransform(midX, midY) ' Define Centre
  Using Format As New StringFormat
    Format.Alignment = StringAlignment.Center
    Format.LineAlignment = StringAlignment.Center
    ' Draw Numerals
    Dim deg As Integer = 360 / 12
    If Numerals Then
      For i As Integer = 1 To 12
        Surface.DrawString(i.ToString(), NumeralFont, TextBrush, _
                           -1 * GetX(i * deg + 90), -1 * GetY(i * deg + 90), Format)
      Next
    End If
  End Using
  Hour = ClockTime.Hour
  Minute = ClockTime.Minute
  Dim Centre As New Point(0, 0)
  If DrawAlarmHand Then ' Draw Alarm Hand
      AlarmAngle = 2.0 * Math.PI * (AlarmTime.Hour + AlarmTime.Minute / 60.0) / 12.0
      Pen.EndCap = LineCap.ArrowAnchor
      Pen.StartCap = LineCap.RoundAnchor
      Pen.Width = CInt(Radius / 20)
      Pen.Color = cAlarmHand
      Dim AlarmHand As New Point(CInt(Radius * Math.Sin(AlarmAngle) / 1.75), _
                                 CInt(-(Radius) * Math.Cos(AlarmAngle) / 1.75))
      Surface.DrawLine(Pen, Centre, AlarmHand) ' Alarm Hour
      AlarmAngle = CType(2.0 * Math.PI * (AlarmTime.Minute + AlarmTime.Second / 60.0) / 60.0, Single)
      AlarmHand = New Point(CInt(Radius * Math.Sin(AlarmAngle) / 1.25), _
                            CInt(-(Radius) * Math.Cos(AlarmAngle) / 1.25))
      Surface.DrawLine(Pen, Centre, AlarmHand) ' Alarm Minute
  End If
  If DrawHourHand Then ' Draw Hour Hand
    HourAngle = 2.0 * Math.PI * (Hour + Minute / 60.0) / 12.0
    Pen.EndCap = LineCap.Round
    Pen.StartCap = LineCap.RoundAnchor
    Pen.Width = CInt(Radius / 14)
    Pen.Color = cHourHand
    Dim HourHand As New Point(CInt(Radius * Math.Sin(HourAngle) / 1.5), _
                              CInt(-(Radius) * Math.Cos(HourAngle) / 1.5))
    Surface.DrawLine(Pen, Centre, HourHand)
  End If
  If DrawMinuteHand Then ' Draw Minute Hand
    If tsMinuteHand = TickStyle.Smooth Then
      MinuteAngle = CType(2.0 * Math.PI * (Minute + Second / 60.0) / 60.0, Single)
    Else
      MinuteAngle = CType(2.0 * Math.PI * (Minute / 60.0), Single)
    End If
    Pen.EndCap = LineCap.Round
    Pen.StartCap = LineCap.RoundAnchor
    Pen.Width = CInt(Radius / 14)
    Pen.Color = cMinuteHand
    Dim MinHand As New Point(CInt(Radius * Math.Sin(MinuteAngle)), _
                             CInt(-(Radius) * Math.Cos(MinuteAngle)))
    Surface.DrawLine(Pen, Centre, MinHand)
  End If
  If DrawSecondHand Then ' Draw Second Hand
      If tsSecondHand = TickStyle.Smooth Then
          Second = ClockTime.Second + (ClockTime.Millisecond * 0.001)
      Else
          Second = ClockTime.Second
      End If
      SecondAngle = 2.0 * Math.PI * Second / 60.0
      Pen.EndCap = LineCap.Triangle
      Pen.StartCap = LineCap.RoundAnchor
      Pen.Width = CInt(Radius / 25)
      Pen.Color = cSecondHand
      Dim SecHand As New Point(CInt(Radius * Math.Sin(SecondAngle)), _
                               CInt(-(Radius) * Math.Cos(SecondAngle)))
      Surface.DrawLine(Pen, Centre, SecHand)
  End If
  Pen.Dispose() ' Cleanup Pen
End Sub
See Below:

Step 7
Again, with the Clock User Control Code View still displayed, enter the Constructor and following Public Properties above "End Class" and below the "Private Methods" section:
''' <summary>Constructor</summary>
Public Sub New()
  ' This call is required by the Windows Form Designer.
  InitializeComponent()
  ' Add any initialization after the InitializeComponent() call.
  Me.SetStyle(ControlStyles.OptimizedDoubleBuffer, True)
  Me.SetStyle(ControlStyles.UserPaint, True)
  Me.SetStyle(ControlStyles.AllPaintingInWmPaint, True)
End Sub

' Public Properties

''' <summary>Determines what Draw Smoothing should be applied</summary>
''' <value>SmoothingMode</value>
''' <returns>Smooth as SmoothingMode</returns>
Public Property DrawSmoothing() As SmoothingMode
  Get
    Return Smooth
  End Get
  Set(ByVal Value As SmoothingMode)
    Smooth = Value
    Invalidate()
  End Set
End Property

''' <summary>Determines what Text Smoothing should be applied</summary>
''' <value>TextRenderingHint</value>
''' <returns>Rendering as TextRenderingHint</returns>
Public Property TextSmoothing() As TextRenderingHint
  Get
    Return Rendering
  End Get
  Set(ByVal Value As TextRenderingHint)
    Rendering = Value
    Invalidate()
  End Set
End Property

''' <summary>Defines Second Hand Tick Style</summary>
''' <value>Value as TickStyle</value>
''' <returns>SecondHand TickStyle</returns>
Public Property SecondHandTickStyle() As TickStyle
  Get
    Return tsSecondHand
  End Get
  Set(ByVal Value As TickStyle)
    tsSecondHand = Value
    Invalidate()
  End Set
End Property

''' <summary>Defines Minute Hand Tick Style</summary>
''' <value>Value as TickStyle</value>
''' <returns>MinuteHand TickStyle</returns>
Public Property MinuteHandTickStyle() As TickStyle
  Get
    Return tsMinuteHand
  End Get
  Set(ByVal Value As TickStyle)
    tsMinuteHand = Value
    Invalidate()
  End Set
End Property

''' <summary>Clock Face Colour</summary>
Public Property FaceColour() As Color
  Get
    Return Face
  End Get
  Set(ByVal Value As Color)
    Face = Value
    Invalidate()
  End Set
End Property

''' <summary>Clock Rim Colour</summary>
Public Property RimColour() As Color
  Get
    Return Rim
  End Get
  Set(ByVal Value As Color)
    Rim = Value
    Invalidate()
  End Set
End Property

''' <summary>Second Hand Colour</summary>
Public Property SecondHandColor() As Color
  Get
    Return cSecondHand
  End Get
  Set(ByVal Value As Color)
    cSecondHand = Value
    Invalidate()
  End Set
End Property

''' <summary>Minute Hand Colour</summary>
Public Property MinuteHandColor() As Color
  Get
    Return cMinuteHand
  End Get
  Set(ByVal Value As Color)
    cMinuteHand = Value
    Invalidate()
  End Set
End Property

''' <summary>Hour Hand Colour</summary>
Public Property HourHandColor() As Color
  Get
    Return cHourHand
  End Get
  Set(ByVal Value As Color)
    cHourHand = Value
    Invalidate()
  End Set
End Property

''' <summary>Alarm Hand Colour</summary>
Public Property AlarmHandColor() As Color
  Get
    Return cAlarmHand
  End Get
  Set(ByVal Value As Color)
    cAlarmHand = Value
    Invalidate()
  End Set
End Property

''' <summary>Numeral Colour</summary>
Public Property NumeralColour() As Color
  Get
    Return NumeralForeColor
  End Get
  Set(ByVal Value As Color)
    NumeralForeColor = Value
    Invalidate()
  End Set
End Property

''' <summary>Draw Second Hand</summary>
Public Property SecondHand() As Boolean
  Get
    Return DrawSecondHand
  End Get
  Set(ByVal Value As Boolean)
    DrawSecondHand = Value
    Invalidate()
  End Set
End Property

''' <summary>Draw Minute Hand</summary>
Public Property MinuteHand() As Boolean
  Get
    Return DrawMinuteHand
  End Get
  Set(ByVal Value As Boolean)
    DrawMinuteHand = Value
    Invalidate()
  End Set
End Property

''' <summary>Draw Hour Hand</summary>
Public Property HourHand() As Boolean
  Get
    Return DrawHourHand
  End Get
  Set(ByVal Value As Boolean)
    DrawHourHand = Value
    Invalidate()
  End Set
End Property

''' <summary>Draw Alarm Hand</summary>
Public Property AlarmHand() As Boolean
  Get
    Return DrawAlarmHand
  End Get
  Set(ByVal Value As Boolean)
    DrawAlarmHand = Value
    Invalidate()
  End Set
End Property

''' <summary>Draw Clock Face Numerals</summary>
Public Property Numerals() As Boolean
  Get
    Return DrawNumerals
  End Get
  Set(ByVal Value As Boolean)
    DrawNumerals = Value
    Invalidate()
  End Set
End Property

''' <summary>Clock Time</summary>
Public Property Time() As DateTime
  Get
    Return ClockTime
  End Get
  Set(ByVal Value As DateTime)
    ClockTime = Value
    Invalidate()
  End Set
End Property

''' <summary>Alarm Time</summary>
Public Property Alarm() As DateTime
  Get
    Return AlarmTime
  End Get
  Set(ByVal Value As DateTime)
    AlarmTime = Value
    Invalidate()
  End Set
End Property
See Below:

Step 8
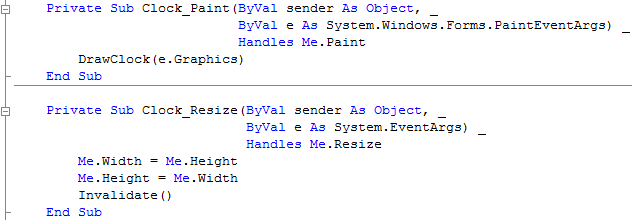
Again while still in the Code View, there are two drop-down boxes, select "(Clock Events)" from the first "(General)", and then from the other "(Declarations)" select "Paint" and type the following in the Clock_Paint(...) Sub:
DrawClock(e.Graphics)
Finally, select "(Clock Events)" from first drop-down list in Code View again then select "Resize" from the "(Declarations)" drop-down and type the following in the Clock_Resize(...) Sub:
Me.Width = Me.Height
Me.Height = Me.Width
Invalidate()
See Below:
Step 9
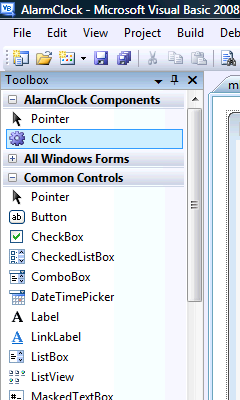
The Clock User Control is now Completed, to use it in the application click on Build, then "Build AlarmClock":
You may be asked to Save your Project, when you do and the Build has completed. Select the Clock Component that appears in the Toolbox under AlarmClock Components:
Step 10
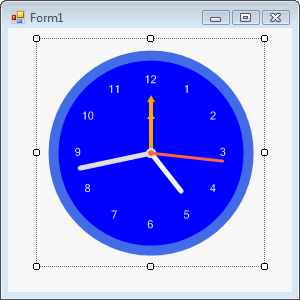
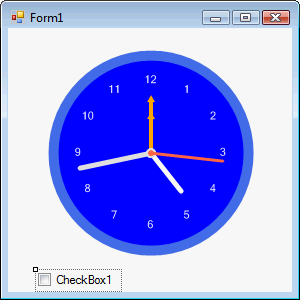
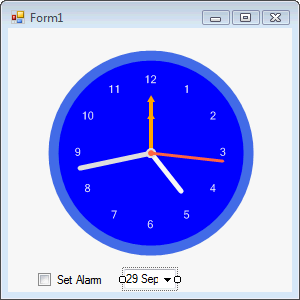
Display frmMain by double-clicking on the entry for it in Solution Explorer, or select the "frmMain [Design]" Tab, then draw the Clock Component on the Form, make sure to position and size the Control so it appears as below:
Step 11
Then goto the Properties box and change the Name to "Clock", without quotes, see Below:
Step 12
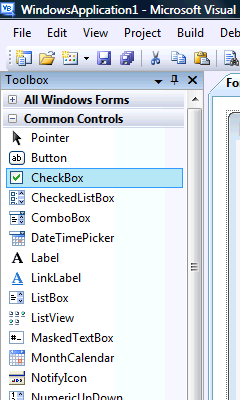
Then from the Common Controls tab on the Toolbox select the CheckBox component:
Step 13
Draw a CheckBox on the Form, make sure to position the Control so it appears as below:
Step 14
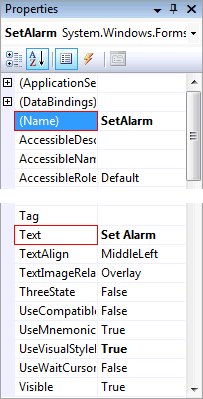
Then goto the Properties box and change the Name to "SetAlarm" and Text to "Set Alarm", both without quotes, see Below:
Step 15
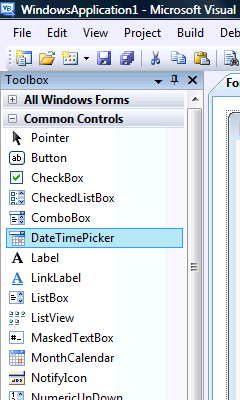
Then from the Common Controls tab on the Toolbox select the DateTimePicker Control, see Below:
Step 16
Draw a DateTimePicker on the Form, make sure to position and size the Control so it appears as below:
Step 17
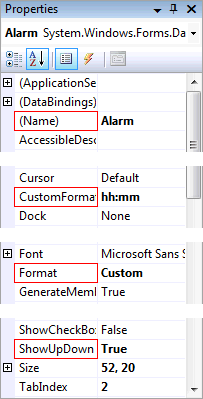
Then goto the Properties box and change the Name to "Alarm", CustomFormat to "hh:mm", Format to "Custom" and ShowUpDown to "True", all without quotes, see Below:
Step 18
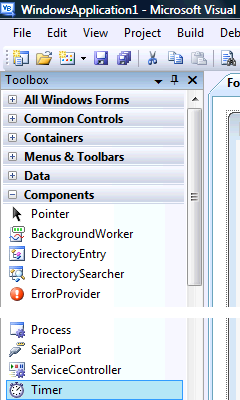
Then from the Components tab on the Toolbox select the Timer Control, see Below:
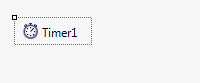
Step 19
Draw a Timer on the Form, or double-click on the Timer entry in the Toolbox, and it will appear in the pane, beneath the form, see below:
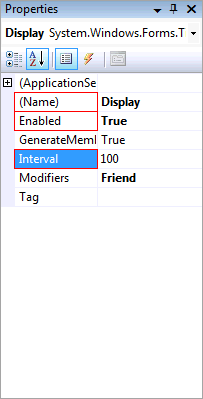
Step 20
Then goto the Properties box and change the Name to "Display, Enabled to "True" and the Interval property to "100", all without quotes, see Below:
Step 21
Click on the [Design] Tab to view the form again or double click on the frmMain entry in Solution Explorer, then Double-click on the DateTimePicker, and type the following in the Alarm_ValueChanged(...) Sub:
Clock.Alarm = Alarm.Value
See Below:

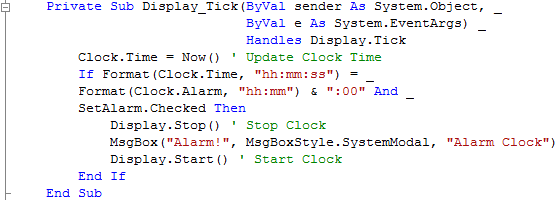
Step 22
Click on the [Design] Tab to view the form again or double click on the frmMain entry in Solution Explorer, then Double-click on the Timer called Display in the Pane below frmMain, and type the following in the Display_Tick(...) Sub:
Clock.Time = Now() ' Update Clock Time
If Format(Clock.Time, "hh:mm:ss") = _
Format(Clock.Alarm, "hh:mm") & ":00" And _
SetAlarm.Checked Then
    Display.Stop() ' Stop Clock
    MsgBox("Alarm!", MsgBoxStyle.SystemModal, "Alarm Clock")
    Display.Start() ' Start Clock
End If
See Below:
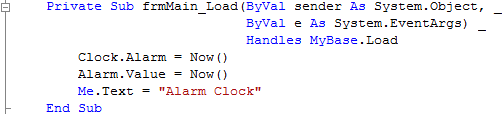
Step 23
Click on the [Design] Tab to view the form again, then Double Click on the Form (frmMain) and type the following in the frmMain_Load() Sub
Clock.Alarm = Now()
Alarm.Value = Now()
Me.Text = "Alarm Clock"
See Below:
Step 24
Save the Project as you have now finished the application, then click on Start:
When you do the following will appear:
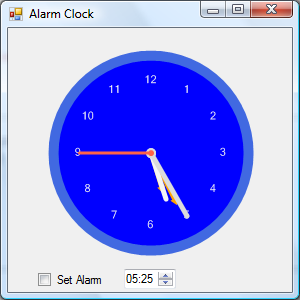
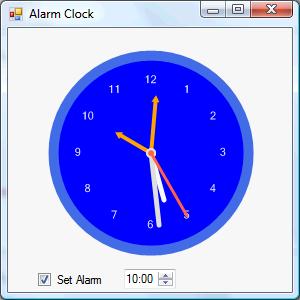
Step 25
Set the Alarm using the DateTimePicker then Check the Set Alarm Checkbox, a Message Box will appear when the Alarm goes off, see below:
Step 26
Click on the Close button ![]() on the top right to end the application.
on the top right to end the application.
This is a very simple Alarm Clock application, you can enhance the Clock by using different colours or change SolidBrush to something else such as a GradientBrush! You can also improve what happens when the Alarm goes off, it is up to you, make it your own!
![]()