You will create a simple Database application using the Database features available in .NET to link with an Access Database File.
Printer Friendly Download Tutorial (179KB) Download Source Code (36.8KB) Download Database File (152KB)
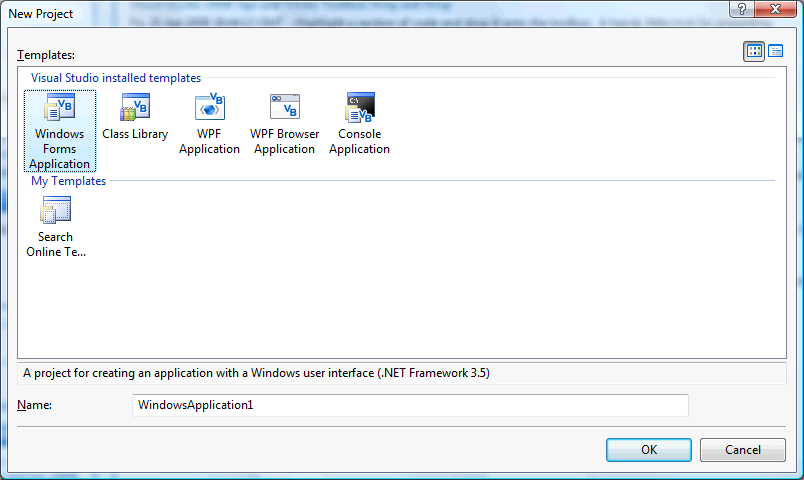
Step 1
Start Microsoft Visual Basic 2008 Express Edition, then select File then New Project... Choose Windows Forms Application from the New Project Window, enter a name for the Project and then click OK, see below:
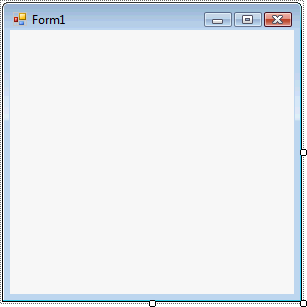
Step 2
A Blank Form named Form1 should then appear, see below:
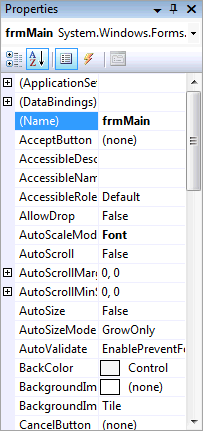
Step 3
With Form1 selected goto the Properties box and change the Name from Form1 to frmMain
Step 4
Then select "Data" then "Add New Data Source..." from the Menu and Choose "Database" if it is not already selected, see below:
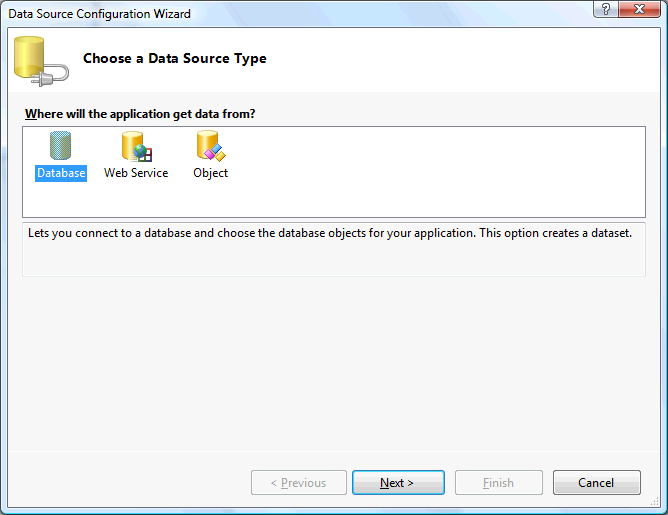
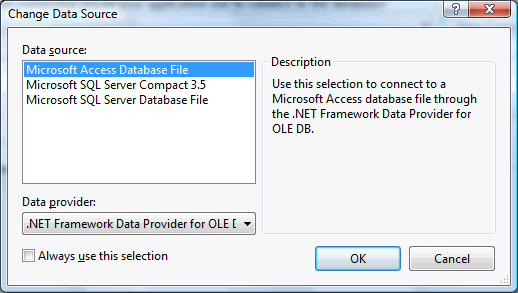
Step 5
Then on the "Choose Your Data Connection" page of the "Data Source Configuration Wizard" select "New Connection...", then set the "Data Source" by clicking "Change..." and then select the "Microsoft Access Database File" option, see below:
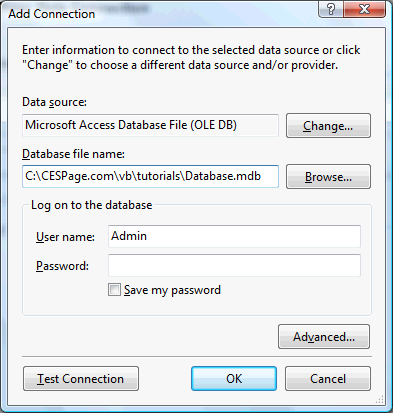
Step 6
Select OK to set this option then the "Add Connection" screen will be displayed, click "Browse..." and then find the Folder containing the "Database File" on your Computer, downloaded from the webpage containing this tutorial, once selected the screen should show similar to below:
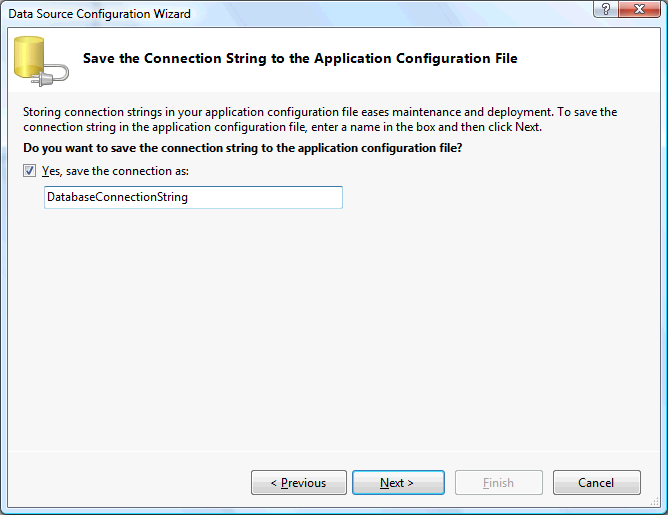
Step 7
Select OK to set the Connection, then from the "Choose Your Data Connection" wizard, select Next and then select Yes for including the Database in the Project if the Database was saved elsewhere, the wizard should show the "Save the Connection String to the Application Configuration File" page, see below:
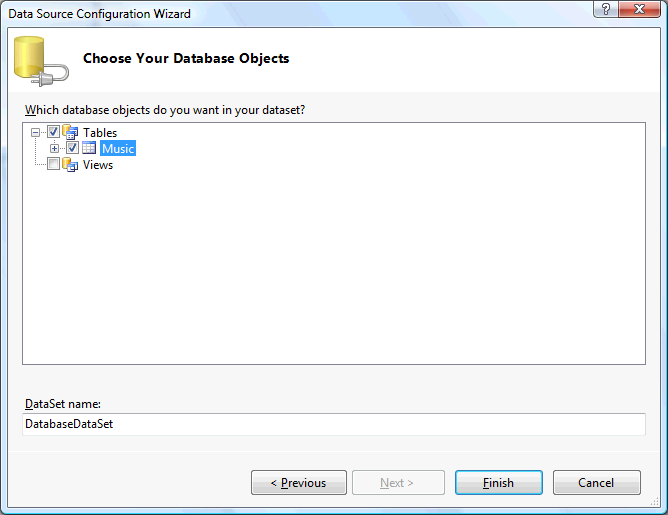
Step 8
Select Next on the Wizard, then on the "Choose Your Database Object", select the Checkbox next to "Tables", see below:
Step 9
Select Finish on the Wizard, if all the previous steps were followed the "Solution Explorer" should contain the below items:
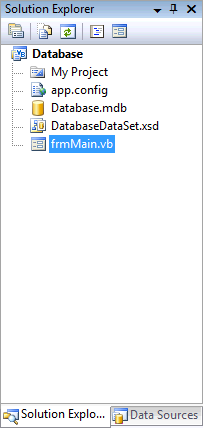
Step 10
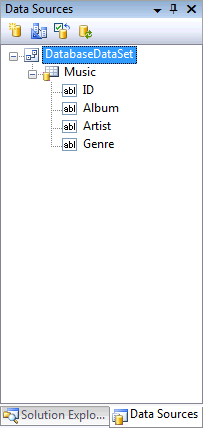
In the "Solution Explorer" select the "Data Sources" tab, this will show the "Music" table included in the Wizard, plus the Fields "ID", "Album", "Artist" and "Genre", see below:
Step 11
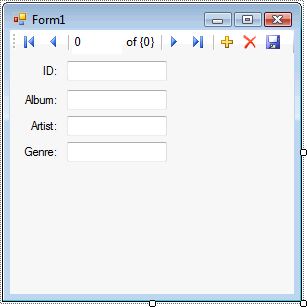
Select "ID" from the "Data Sources" tab on "Solution Explorer", then drag and drop onto the Form, which is keeping clicked on the ID then moveto drag until over the form then release to drop onto the Form, the Form will look as below:

Step 12
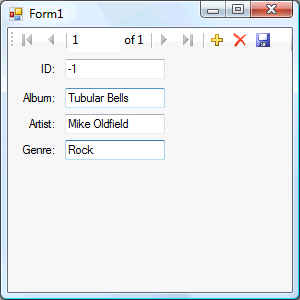
The "ID" Label and Textbox on the Form can be moved by clicking on it and moving it about the Form, select the "Album" item from "Solution Explorer" and drag and drop that onto the form, repeat this for the "Artist" and "Genre" fields, the Form should then look as below:
Step 13
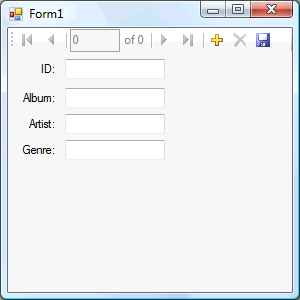
Save the Project as you have now finished the application, then click on Start:
When you do the following will appear:
Step 14
Just select the "Add" button - looks like a plus-sign then Enter some information in the Album, Artist and Genre Boxes, see below:
Step 15
Click on the Close button ![]() on the top right to end the application.
on the top right to end the application.
This is a very simple example of how to create a Database-aware application using the Database features of Visual Basic 2008 - however it does have a problem it does not work with 64bit operating systems at all, this is why the tutorial has been delayed however there is not a solution except to use SQL Server Express. You can try and have a look at the Database options available as well as using a different Database File - even make it use another Database Provider such as SQL Server and make it your own!
![]()