Text Editing is one of the most common tasks performed, this tutorial will show you who to create your own Text Editor, using the TextBox, Open/Save & Font/Colour Dialogs and more!
This part will show you how to create the Text Editor, Part Two will add Find & Replace to the Text Editor.
Printer Friendly Download Tutorial (297KB) Download Source Code (12.9KB)
Step 1
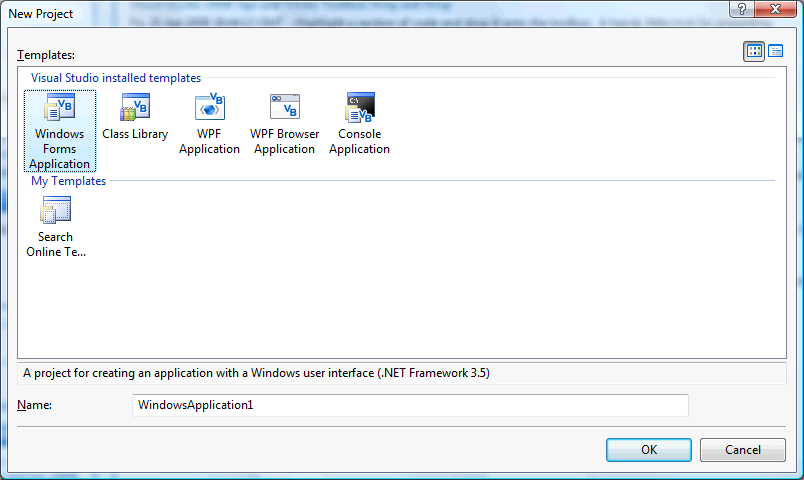
Start Microsoft Visual Basic 2008 Express Edition, then select File then New Project... Choose Windows Forms Application from the New Project Window, enter a name for the Project and then click OK, see below:
Step 2
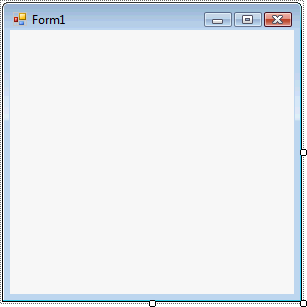
A Blank Form named Form1 should then appear, see below:
Step 3
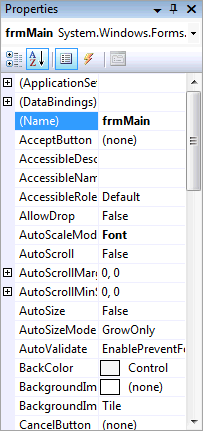
With Form1 selected goto the Properties box and change the Name from Form1 to frmMain
Step 4
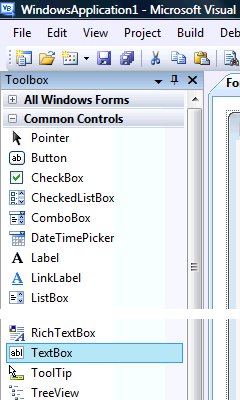
Then from the Common Controls tab on the Toolbox select the Textbox component:
Step 5
Draw a Textbox on the Form, see below:
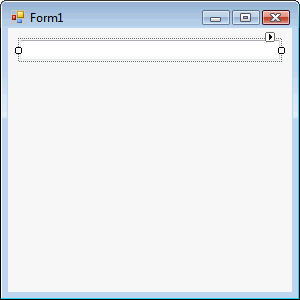
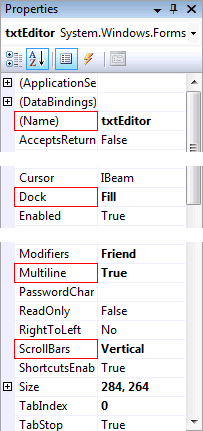
Step 6
Then goto the Properties box and change the Name to txtEditor, Dock to Fill, Multiline to True and Scrollbars to Vertical, see Below:
Step 7
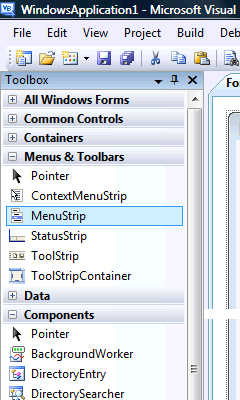
Then from the Menus & Toolbars tab on the Toolbox select the MenuStrip Control, see Below:
Step 8
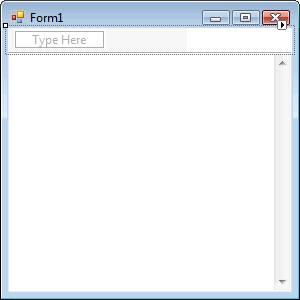
Either double-click on the MenuStrip Control entry in the Menu & Toolbars tab on the Toolbox or keep the MenuStrip Component Clicked and then move it over the Form then let go. Change the Name of the MenuStrip in the properties to mnuText The Form will then look as below:
Step 9
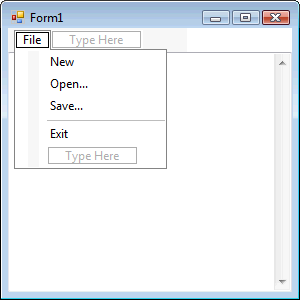
Click or select where the MenuStrip says "Type Here", an editable Textbox will appear type in "File" without the quotes in this Box, then in the Box below that type in "New", below that "Open...", then "Save...", then "-" which is minus or the hyphen key which will appear as a Seperator and then finally "Exit". The MenuStrip should look as below:
Step 10
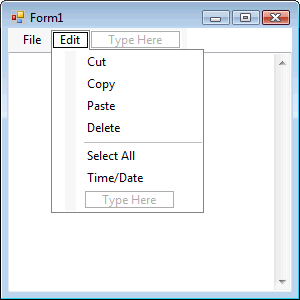
Click or select where the MenuStrip says "Type Here" next to "File", and in this type in "Edit" without the quotes in this Box, then in the Box below that type "Cut", then below that "Copy", then "Paste" and "Delete", type in "-" which is minus or the hyphen key for a Seperator, then below that "Select All" and finally "Time/Date". The MenuStrip should look as below:
Step 11
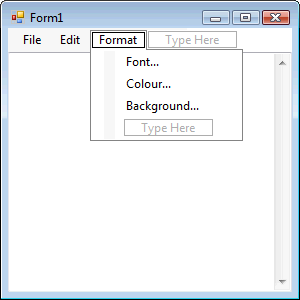
Click on or select the MenuStrip again, on this next to the Edit menu will be another "Type Here" option this this box type "Format" without the quotes, then in the "Type Here" box under that type "Font...", then below that "Colour..." and finally "Background...", see below:
Step 12
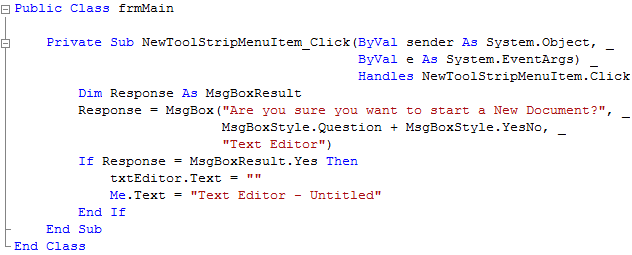
Click on "File" on the MenuStrip to show the MenuStrip then Double Click on the Menu Item Labeled "New" (NewToolStripMenuItem) and type the following in the NewToolStripMenuItem_Click() Sub:
        Dim Response As MsgBoxResult
        Response = MsgBox("Are you sure you want to start a New Document?", _
                          MsgBoxStyle.Question + MsgBoxStyle.YesNo, _
                          "Text Editor")
        If Response = MsgBoxResult.Yes Then
            txtEditor.Text = ""
            Me.Text = "Text Editor - Untitled"
        End If
See Below:
Step 13
Click on the [Design] Tab to view the form again, then Click on "File" on the MenuStrip to show the MenuStrip then Double Click on the Menu Item Labeled "Open..." (OpenToolStripMenuItem) and type the following in the OpenToolStripMenuItem_Click() Sub:
Dim Open As New OpenFileDialog()
Dim myStreamReader As System.IO.StreamReader
Open.Filter = "Plain Text Files (*.txt)|*.txt|All files (*.*)|*.*"
Open.CheckFileExists = True
Open.ShowDialog(Me)
Try
  Open.OpenFile()
  myStreamReader = System.IO.File.OpenText(Open.FileName)
  txtEditor.Text = myStreamReader.ReadToEnd()
  Me.Text = "Text Editor - " & Open.FileName
Catch ex As Exception
  ' Do nothing on Exception
End Try
See Below:

Step 14
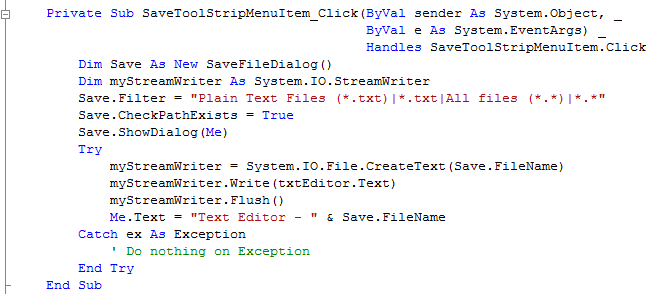
Click on the [Design] Tab to view the form again, then Click on "File" on the MenuStrip to show the MenuStrip then Double Click on the Menu Item Labeled "Save..." (SaveToolStripMenuItem) and type the following in the SaveToolStripMenuItem_Click() Sub
Dim Save As New SaveFileDialog()
Dim myStreamWriter As System.IO.StreamWriter
Save.Filter = "Plain Text Files (*.txt)|*.txt|All files (*.*)|*.*"
Save.CheckPathExists = True
Save.ShowDialog(Me)
Try
  myStreamWriter = System.IO.File.CreateText(Save.FileName)
  myStreamWriter.Write(txtEditor.Text)
  myStreamWriter.Flush()
  Me.Text = "Text Editor - " & Save.FileName
Catch ex As Exception
  ' Do nothing on Exception
End Try
See Below:
Step 15
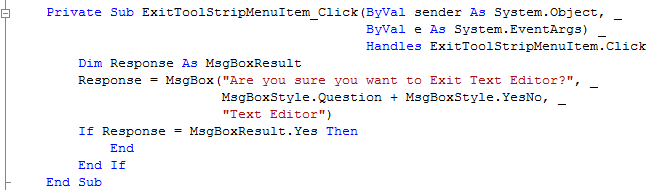
Click on the [Design] Tab to view the form again, then Click on "File" on the MenuStrip to show the MenuStrip then Double Click on the Menu Item Labeled "Exit" (ExitToolStripMenuItem) and type the following in the ExitToolStripMenuItem_Click() Sub
        Dim Response As MsgBoxResult
        Response = MsgBox("Are you sure you want to Exit Text Editor?", _
                          MsgBoxStyle.Question + MsgBoxStyle.YesNo, _
                          "Text Editor")
        If Response = MsgBoxResult.Yes Then
            End
        End If
See Below:
Step 16
Click on "Edit" on the MenuStrip to show the MenuStrip then Double Click on the Menu Item Labeled "Cut" (CutToolStripMenuItem) and type the following in the CutToolStripMenuItem_Click() Sub:
txtEditor.Cut()
See Below:

Step 17
Click on the [Design] Tab to view the form again or double click on the Form's name in the Solution Explorer, then Click on "Edit" on the MenuStrip to show the MenuStrip then Double Click on the Menu Item Labeled "Copy" (CopyToolStripMenuItem) and type the following in the CopyToolStripMenuItem_Click() Sub:
txtEditor.Copy()
See Below:

Step 18
Click on the [Design] Tab to view the form again or double click on the Form's name in the Solution Explorer, then Click on "Edit" on the MenuStrip to show the MenuStrip then Double Click on the Menu Item Labeled "Paste" (PasteToolStripMenuItem) and type the following in the PasteToolStripMenuItem_Click() Sub:
txtEditor.Paste()
See Below:

Step 19
Click on the [Design] Tab to view the form again or double click on the Form's name in the Solution Explorer, then Click on "Edit" on the MenuStrip to show the MenuStrip then Double Click on the Menu Item Labeled "Delete" (DeleteToolStripMenuItem) and type the following in the DeleteToolStripMenuItem_Click() Sub:
txtEditor.SelectedText = ""
See Below:

Step 20
Click on the [Design] Tab to view the form again or double click on the Form's name in the Solution Explorer, then Click on "Edit" on the MenuStrip to show the MenuStrip then Double Click on the Menu Item Labeled "Select All" (SelectAllToolStripMenuItem) and type the following in the SelectAllToolStripMenuItem_Click() Sub:
txtEditor.SelectAll()
See Below:

Step 21
Click on the [Design] Tab to view the form again or double click on the Form's name in the Solution Explorer, then Click on "Edit" on the MenuStrip to show the MenuStrip then Double Click on the Menu Item Labeled "Time/Date" (TimeDateToolStripMenuItem) and type the following in the TimeDateToolStripMenuItem_Click() Sub:
txtEditor.SelectedText = Format(Now, "HH:mm dd/MM/yyyy")
See Below:

Step 22
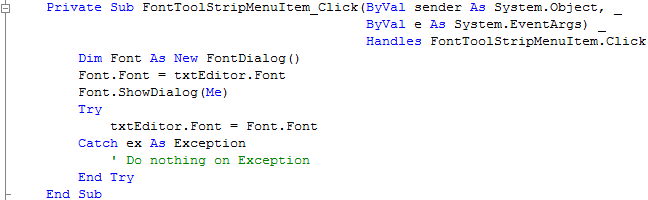
Click on [Design] tab or double click on the Form's name in Solution Explorer then click on "Format" on the MenuStrip to show the MenuStrip then Double Click on the Menu Item Labeled "Font..." (FontToolStripMenuItem) and type the following in the FontToolStripMenuItem_Click() Sub:
Dim Font As New FontDialog()
Font.Font = txtEditor.Font
Font.ShowDialog(Me)
Try
  txtEditor.Font = Font.Font
Catch ex As Exception
  ' Do nothing on Exception
End Try
See Below:
Step 23
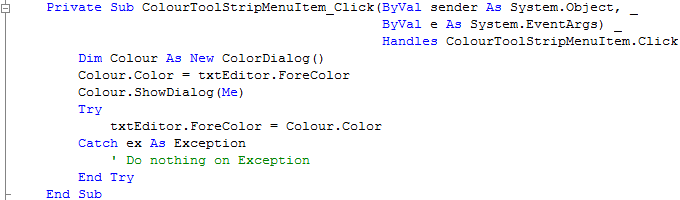
Click on the [Design] Tab to view the form again or double click on the Form's name in the Solution Explorer, then Click on "Format" on the MenuStrip to show the MenuStrip then Double Click on the Menu Item Labeled "Colour..." (ColourToolStripMenuItem) and type the following in the ColourToolStripMenuItem_Click() Sub:
Dim Colour As New ColorDialog()
Colour.Color = txtEditor.ForeColor
Colour.ShowDialog(Me)
Try
  txtEditor.ForeColor = Colour.Color
Catch ex As Exception
  ' Do nothing on Exception
End Try
See Below:
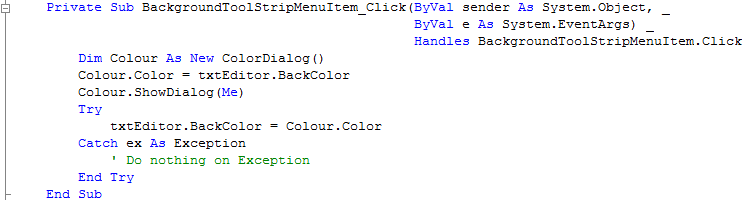
Step 24
Click on the [Design] Tab to view the form again or double click on the Form's name in the Solution Explorer, then Click on "Format" on the MenuStrip to show the MenuStrip then Double Click on the Menu Item Labeled "Background..." (BackgroundToolStripMenuItem) and type the following in the BackgroundToolStripMenuItem_Click() Sub:
Dim Colour As New ColorDialog()
Colour.Color = txtEditor.BackColor
Colour.ShowDialog(Me)
Try
  txtEditor.BackColor = Colour.Color
Catch ex As Exception
  ' Do nothing on Exception
End Try
See Below:
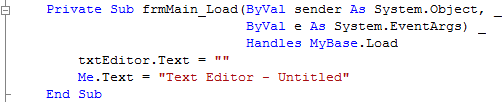
Step 25
Click on the [Design] Tab to view the form again, then Double Click on the Form (frmMain) and type the following in the frmMain_Load() Sub
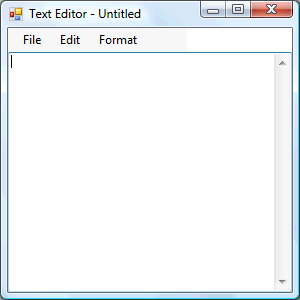
txtEditor.Text = ""
Me.Text = "Text Editor - Untitled"
See Below:
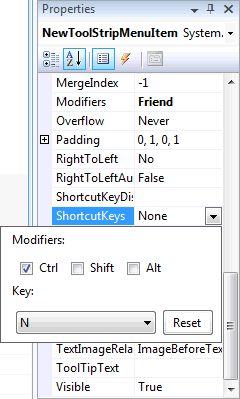
Step 26
Steps 26-28 are optional and just add Keyboard Shortcuts to the MenuItems, you don't have to do these if you don't want to!
Click on the [Design] Tab to view the form again, click on "New" on the MenuStrip then in the Properties box look for the "ShortcutKeys" option and
click on the Drop Down arrow where "None" appears. Check the "Ctrl" Checkbox in "Modifiers" and then in the "Key" dropdown list select "N",
see below:
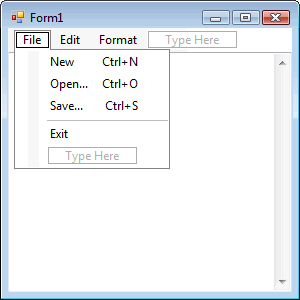
Step 27
Set the rest of the "File" MenuItem "ShortcutKeys" Properties except the "Exit" Menu Item, "Open" should be set to "Ctrl+O" and "Save" to "Ctrl+S", the File Menu should appear as below:
Step 28
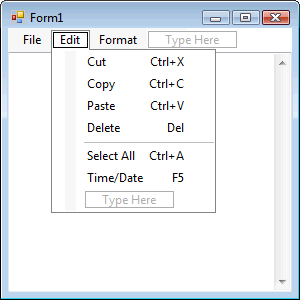
Click on or select the "Edit" Menu and set the "ShortcutKeys" Properties, "Cut" should be set to "Ctrl+X", "Copy" to "Ctrl+C", "Paste" to "Ctrl+V", "Delete" should be just "Del" in the Keys drop-down list, "Select All" should be "Ctrl+A", "Time/Date" should be just "F5" from the Keys drop-down list. The Edit Menu should appear as below:
Step 29
Save the Project as you have now finished the application, then click on Start:
When you do the following will appear:
Step 30
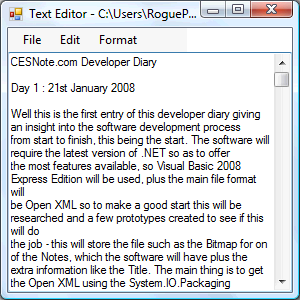
Click on the File Menu and select Open...,this will show the Open File Dialog, then select a Text File on your Computer this should appear in the Textbox, see below:
Step 31
Click File then Exit or click on the Close button ![]() on the top right of the Text Editor to end the application.
on the top right of the Text Editor to end the application.
This Text Editor has all the main Editing and Format features you would expect from a Plain Text Editor, plus has added some extra enhancements such as Shortcut Keys and Foreground / Background Colours.
![]()